Thanks to the Age of Katanas supplement written by the Erize brothers, in association, the Japanese Middle Ages is widely played. So, we decided to reconstruct a historic battle: the siege of Fushimi castle. It was fought at the end of the Sengoku period (i.e. "Warring States period"), it is the final part of the Japanese Middle Ages which ends in 1603.
During this era, due to the weakening of central power, various revolts took place. Many daimyō founded real states. If, at the end of 1500 there were around 300 kingdoms, a century later, the power struggles were so bloody that the daimyō were reduced to less than 20.
There are many famous characters that could worthy of being mentioned. Among these, Oda Nobunaga, whose actions almost managed to lead to a first attempt at reunification of the country. After his assassination in 1582, a trusted collaborator becomes leader of his clan: Toyotomi Hideyoshi. Once he came to power he named himself Kanpaku, or "regent of the Emperor". Upon his death (1598) his son was too young to succeed him, so he decided to appoint a council of five Regents made up of five daimyō. Hideyoshi chooses the nobles of the council following two rules: they are the most powerful and they hate each other. In this way he hopes to be able to balance their powers. Unfortunately, he is wrong.

Tokugawa is the most important of the various regents and is in a struggle for power with another daimyō: Ishida Mitsunari.
The siege of Fushimi was fought between the end of August and September 1600, and it is one of those battles that is not very famous but which, if they had had different outcomes, perhaps would have changed history. The castle was controlled by Torii Mototada, a loyal follower of Tokugawa.
It is the dawn of August 27, 1600 when Ishida Mitsunari and his ally Kobayakawa Hideaki appear in front of the castle gates with around 40,000 men. Ishida and Kobayakawa are probably hoping for a change of alliance from Mototada or, at worst, a quick conquest. Mototada, now sixty-two years old, can count on less than 2,000 men. Unfortunately for them, the castellan has no intention to surrender.
Set up of the scenario
The table is 6 x 8 feet (180 x 240 cm) in size. The scenario was entirely written by our club member Antonio Dell'Erba. Although in historical reality the balance of power was approximately 20 to 1. In our simulation the ratio is 2 to 1.
The defender has a free three-server cannon at his disposal while the attacker can deploy a free Tsukaiban.
The defender has a free three-server cannon at his disposal while the attacker can deploy a free Tsukaiban.

Before the match the two sides will have to proceed with the tea ceremony. Ishida can add 1 to his die roll.

Forces
The Tokugawa clan is under the orders of Torii Mototada and can put its forces inside the castle at a minimum distance of 8 inches from the walls. The cannon is placed on the north side of the fortification but cannot move, only rotate, during the game. The cannon uses the skirmish specialist rule. The defenders will be controlled by two leaders: Mototada will be a Taisho (5CP) (1,000 pts or 1,500 pts) and a Kogashira (3CP) (1,000 pts) or Kumigashira (4CP) (1,500 pts).
The defender places two targets at least 40 inches apart and 8 inches from the walls. Each objective represents information needed by the attacker for the subsequent battle of Sekigahara.
Ishida and Kobayakawa's forces are organized in two waves and deploy outside the walls. The first wave is 2/3 of the initial strength. From the second round, the attackers' forces in reserve will enter from one of the four cardinal points. How reinforcements enter is decided by a die roll. Once they arrive on the table they will place under the control of the closest leader.
The army will be commanded by 4 Leaders, two of these (Ishida Mitsunari and Kobayakawa Hideaki) will be Kumigashira (4CP) (2,000 pts) or Taisho (5CP) (3,000 pts), the other two will be (one will be the Leader of the Uesugi units) Kogashira (3CP) (2,000 pts) or Kumigashira (4CP) (3,000 pts).
The Toyotomi and Uesugi clans will be "Close Allies" (p. 119 Clash of Spears) so the various commanders will be able to give orders to allied troops without need additional CP.
All leaders fight on foot. For each objective achieved, the morale of the Togukawa will virtually decrease by one point. The side that reaches 3 break points first is forced to take a test.
Army list
For the army list please see the following link >> Assedio di Fushimi – Cash of Katanas (genn 20, 2024) – La Piccola Armata (wordpress.com)
Victory conditions
The Attacker wins if he manages to make his opponent fail the Break Test.
The Attacker wins if, at the end of the game, he has conquered 2 Objectives.
The Attacker wins if, at the end of the game, he has conquered at least 1 Objective and has a unit, with at least 3 figures, in contact with the main entrance of the Castle (captures Torii Mototada's family).
The Defender wins if he manages to make his opponent fail the Break Test.
The Defender wins if, at the end of the game, he manages to avoid any other victory conditions of the Attacker.

Special rules
To speed up actions and make the game more fluid we have included some special rules. During the game, a player can activate up to 4 units, one per leader if attacking, two per leader if defender. The other player can react with a maximum of 4 units but each unit will take only one action. No unit can be the target of two enemies except in the case of cannon.

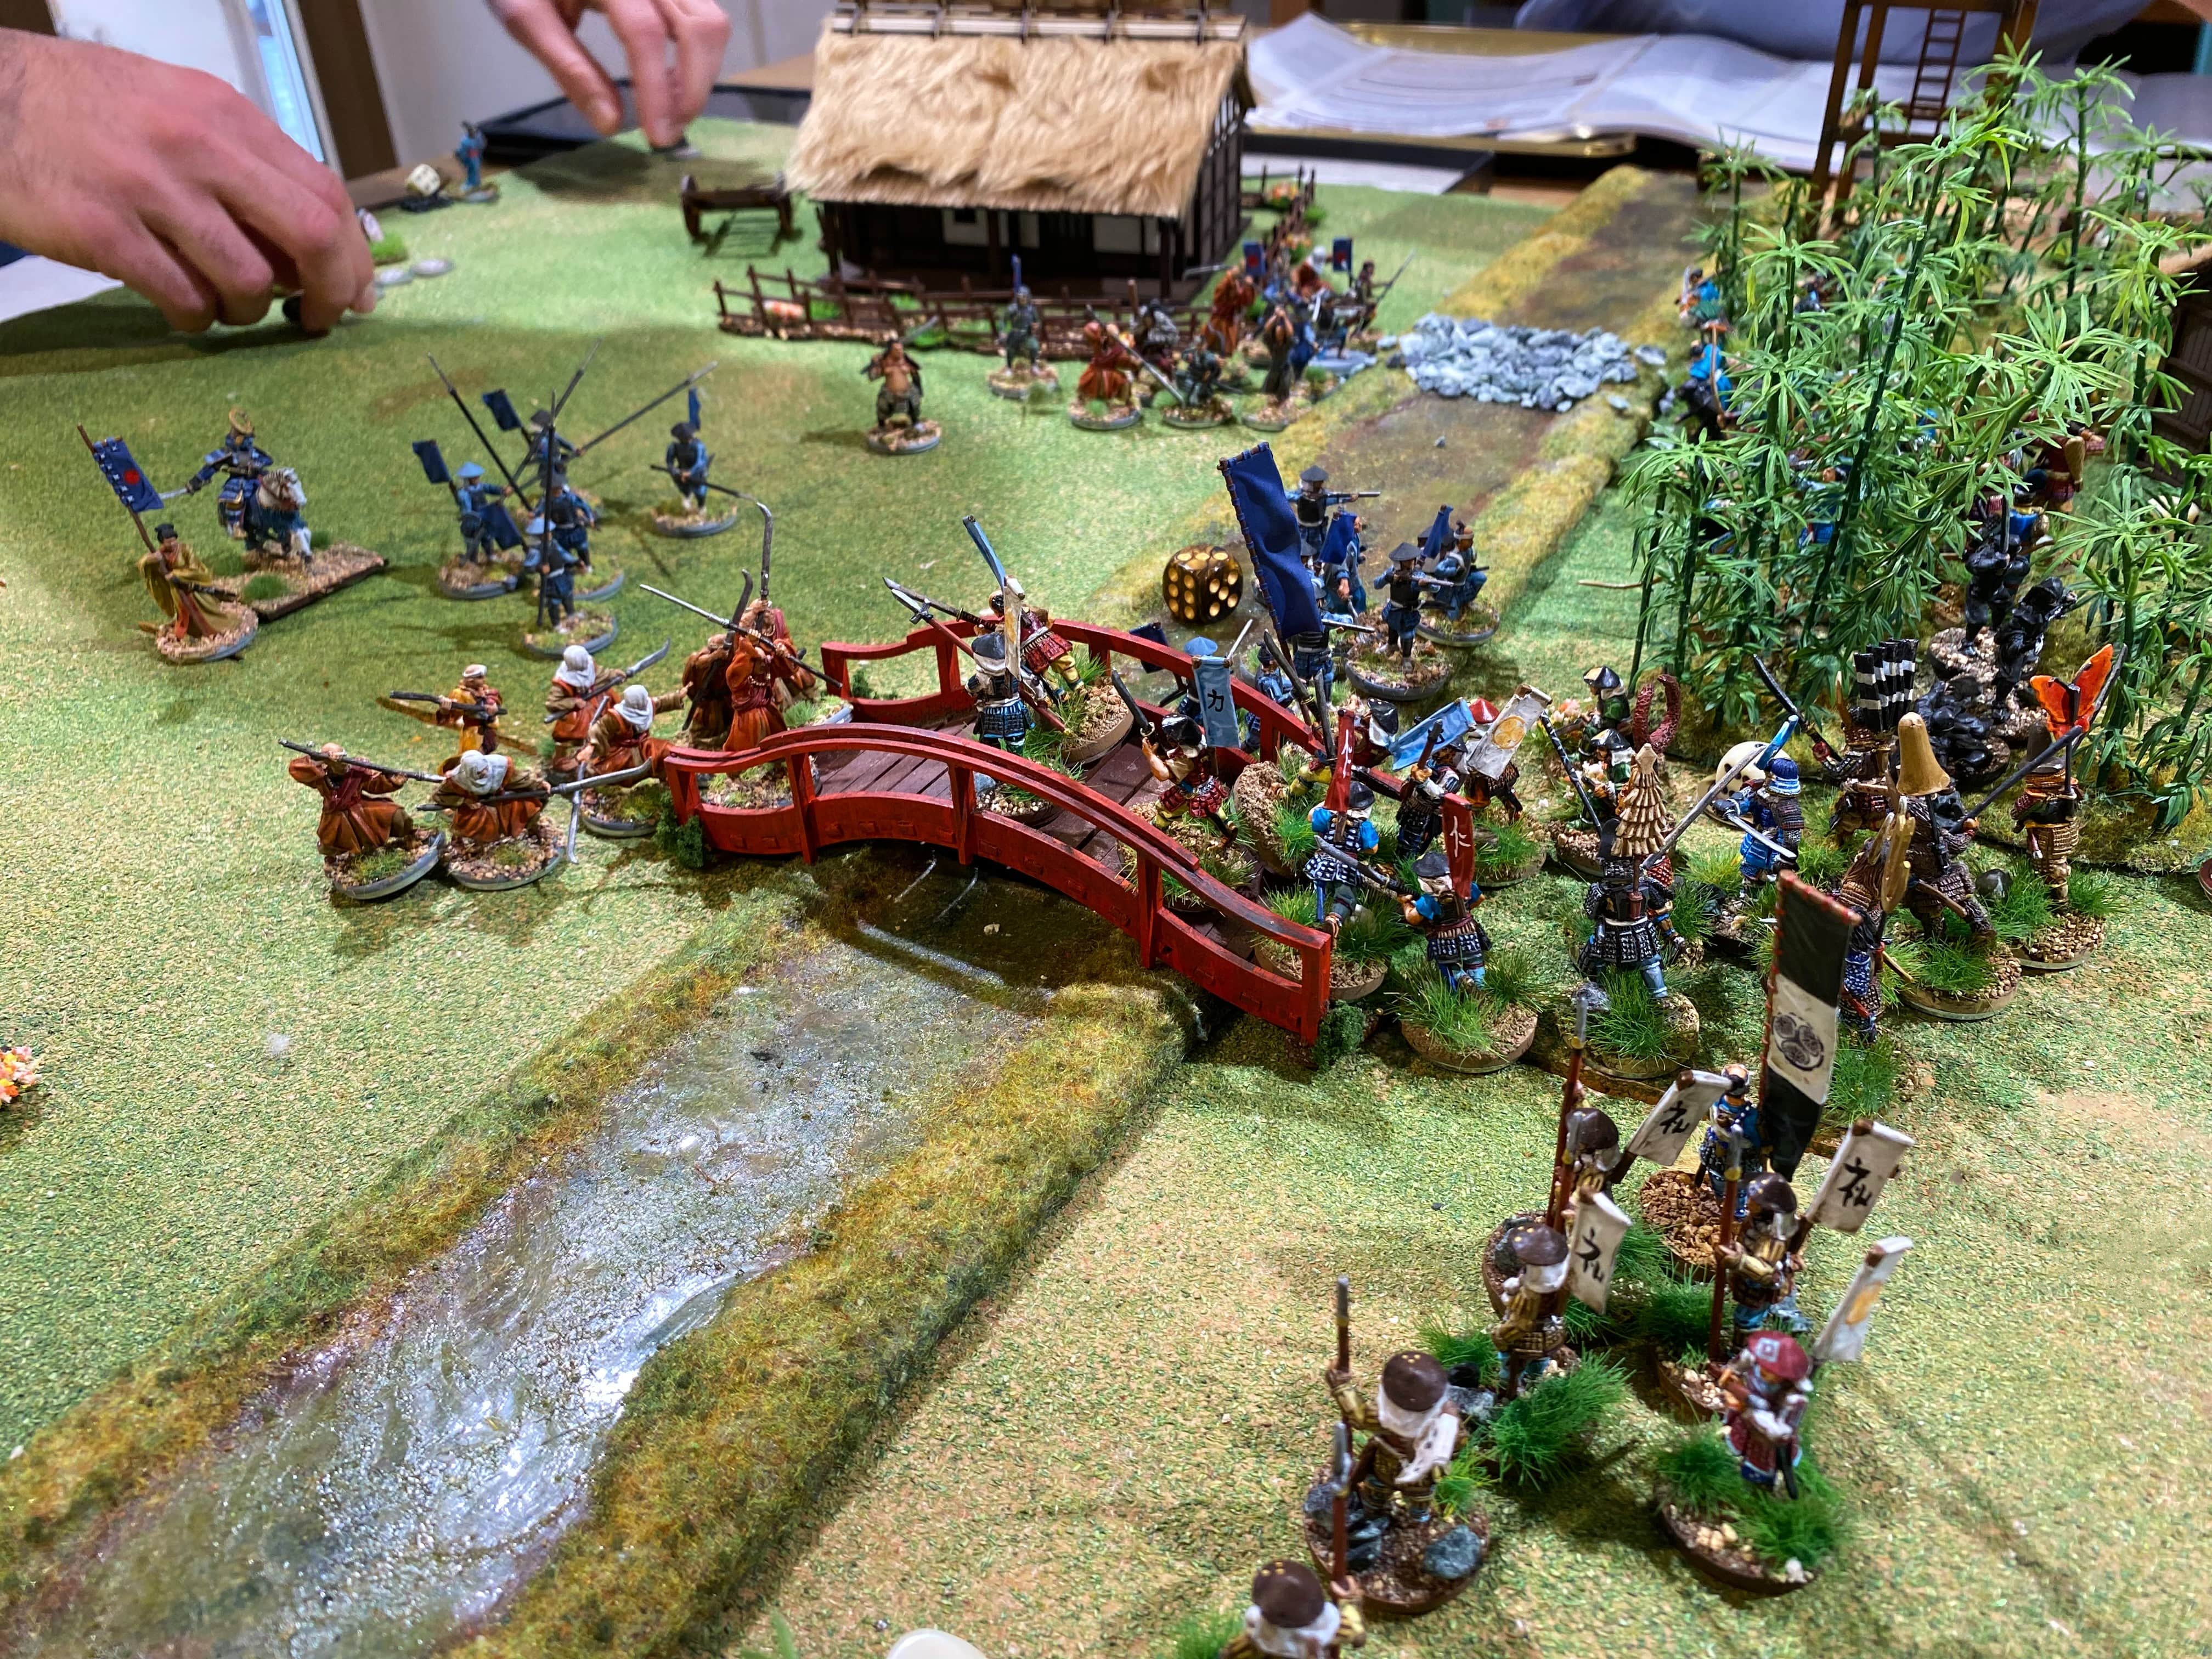
Battle report
The match was played in my club, "La Piccola Armata", with 7 players: 2 in defense and 5 in attack with the help of an eighth person as referee.
The attackers act first. The scenario is a table where a Japanese castle is in the center surrounded by walls. On the four cardinal points the besiegers have opened breaches, and from these points, they can enter.
The attackers act first. The scenario is a table where a Japanese castle is in the center surrounded by walls. On the four cardinal points the besiegers have opened breaches, and from these points, they can enter.

The attacker is the first to act. The defenders deploy their troops to the north and south of the castle. To the north, the Torii line up with arquebusiers, samurai and pikemen. To the south, a similar force is commanded by Torii's ally along with some knights. Given the numerical inferiority, the besieged are vulnerable on the flanks. For this reason the Torii places the cannon to cover the breach to the East. To the West the defender takes shelter behind some low walls making the approach difficult.
The first three rounds are an attempt to test the defenders by the attacker. The forces of the first wave proceeding from the North but they are moving slowly. On the contrary, the forces attacking from the south try to conquer the first objective but are pushed back by the arquebuses fire. To the east the cannon prevents attackers from entering the castle. Although the defenders were numerically inferior, at mid-game they keep their positions and the objectives.

In the fourth round the attacker changes strategy. He decides to concentrate attacks on Torii's position by launching units from three sides: North, East and West. The besiegers in the West are repelled but the Torii samurai, after a strenuous defense, are forced to give up ground and grant the attacker an objective.

In the fifth turn the cannon destroys the few units that the besiegers had left in the West and, in this way, Torii moves what remains of his forces to defend the entrance to the castle. To the south, enemy attacks were repelled by the defenders thanks to the charges of the cavalry. The second objective remains in the hands of the besieged. Everything will be decided in the last rounds.

The sixth round. The only cavalry unit of the defenders, now exhausted, is attacked by samurai and eliminated. The attackers concentrate their efforts on two directions: from the South-West and from the North. The combined forces of two leaders attack Torii's ally who holds the secret information. Only with the sacrifice of all the arquebusiers and an exhausted unit of archers (4 efforts) is he able to compete with the enemies for control of the last objective the defenders have left.
The last chance for the attackers to win the game is to capture the entrance to the castle. Torii and his last unit of samurai are defending castle gates. The narrow passage is an advantage for the defenders but the enemy troops are overwhelming. After two cavalry charges and a heroic counter-charge by the Togukawa samurai the doors are open. Torii takes refuge inside.
The players' roll denies Torii a seventh turn.

The end
In historical reality, the defense was concentrated in the central keep much earlier than what is reported in our battle.
After ten days of continuous attacks Ishida has not yet taken control of the castle. On 8 September a fire, started from inside, set one of the towers on fire. Thanks to the confusion, the besiegers break in. While the central keep goes up in flames and fighting continues, Torii and his family barricade themselves in one of the rooms. Rather than give in to the enemy Torii Mototada sacrifices his family and himself with ritual suicide: seppuku.
On September 8, Ishida can say he took control of a smoking ruin but the time required in the siege allowed Tokugawa Ieyasu to find new strength.
In the battle of Sekigahara Ishida will be beaten by Tokugawa.
Appointed by Emperor Go-Yezei: Shōgun in 1603 will give rise to the Tokugawa Shogunate, concluding the Sengoku period.
Oda Nobunaga, Tokugawa Ieyasu and Toyotomi Hideyoshi are still considered the three founders of modern Japan today.

Minis
Scale 28 mm. Manufacturers Steel Fist, Perry, Warlord Games
Dipinte da Antonio Dell’Erba (Samurai and ashigaru Tokugawa), Alessandro Crisafulli (Samurai, monks and ashigaru Uesugi), Riccardo Marchesi e Rodolfo Simonetto (Samurai and ashigaru Toyotomi)


.JPG)


.JPG)


.JPG)