Background
May
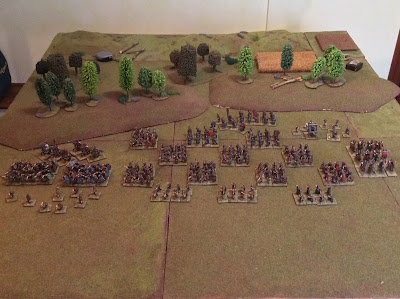
1859 – Italy. An Austrian division is attacking an
Italian/Sardinian position. The Austrian battle order is typical: two
brigades, a tactical reserve and artillery. At the beginning of the
battle the Italians has two small detachments and they have a
position to defend.
Rule
system:
L'Italia s'è desta! Created by Paolo M.
Miniatures
All
miniatures are 28mm and are painted by Alberto M., Paolo M., Franco
B., Franco Bel.
Battle
orders
Austrian
Army [20
units + 1 HQ]
1st Brigade: 7
units [including: 1 jager (hunter,
elite +1),
1 grenadier (elite
+1),
1 command and a field artillery]
2nd Brigade 7
units [including: 1 jager (hunter,
elite +1),
1 grenadier (elite
+1),
1 command and a field artillery]
Reserve
detachment 4
units [2 infantry, 1 field artillery, 1 command]
Independent
detachment 2
units [1 cavalry (independent)
and 1 corps artillery]
Head
Quarter [1
unit]
Sardinian
Army [19
units + 1 HQ]
1st Detachment: 5
units [including: 1 bersaglieri (hunter,
training +2)
and 1 command
2nd Detachment: 5
units [including: 1 field artillery and 1 command]
1st Brigade:
8 units [including: 1 field artillery and 1 command]
Independent
detachment 1
units [1 cavalry (independent)]
Head
Quarter [1
unit]
Initial
deployment
Sardinian
forces:
they deploy the units for first but they move after the Austrian
army.
During
the first round only the 1st and
the 2nd detachment
are on the field [Sector 2]
The
HQ will enter at the beginning of 3rd round
[Sector 1]
The
brigade deploy at the 6th round
[Sector 1]
Austrian
forces:
they deploy their units after Sardinian forces but move for first.
At
the beginnings of the battle Austrian have on the table all the units
but they have to line up their forces in the sector 3.
The
independent detachment will enter at the 6th round
[Sector 3]
Set
up
15
turns. The Austrians move for first
Victory
conditions
The
army that destroys 7 units of the enemy wins
or
The
Austrians has to throw out Sardinian forces from Sector 2.
Battle
report
Phase
1
The
Austrians start moving their forces towards the houses on their right
flank while Sardinians try to defend the position in the centre
Phase
2
After
a couple of turns the Austrian’s attack is concentrated on the
houses
Defended
by a group of Jager, the 2nd Austrian brigades assaults the houses.
Meanwhile the cavalry try to outflank the enemy units
In
the centre the situation remains substantially steady
Phase
3
At
the 6th
round Sardinian reinforces arrive but it is too late
The
2nd
Austrian brigades takes the houses while the cavalry arrives at the
backs of the Sardinians positions. The 2nd
Italian detachment is completely destroyed … The Austrians win.


